Donations API setup
The API setup for monetary donations allows you to build a totally custom donation experience that will live in your product. If you don’t need a custom setup and are limited in engineering resource please have a look at our hosted setup.
With our API only setup, you simply create donations using the Donations API and Goodstack will keep track of your donations, request payment from you and handle timely disbursement of the donations to the nonprofits.
There are many ways to build donations into your product including one-off donations, round ups and recurring donations. Below we will outline a typical flow for allowing users to make one off donations to the nonprofit of their choice.
1. Get your API keys
Get in touch with our product & engineering team to get access to the dashboard: engineering-support@goodstack.io
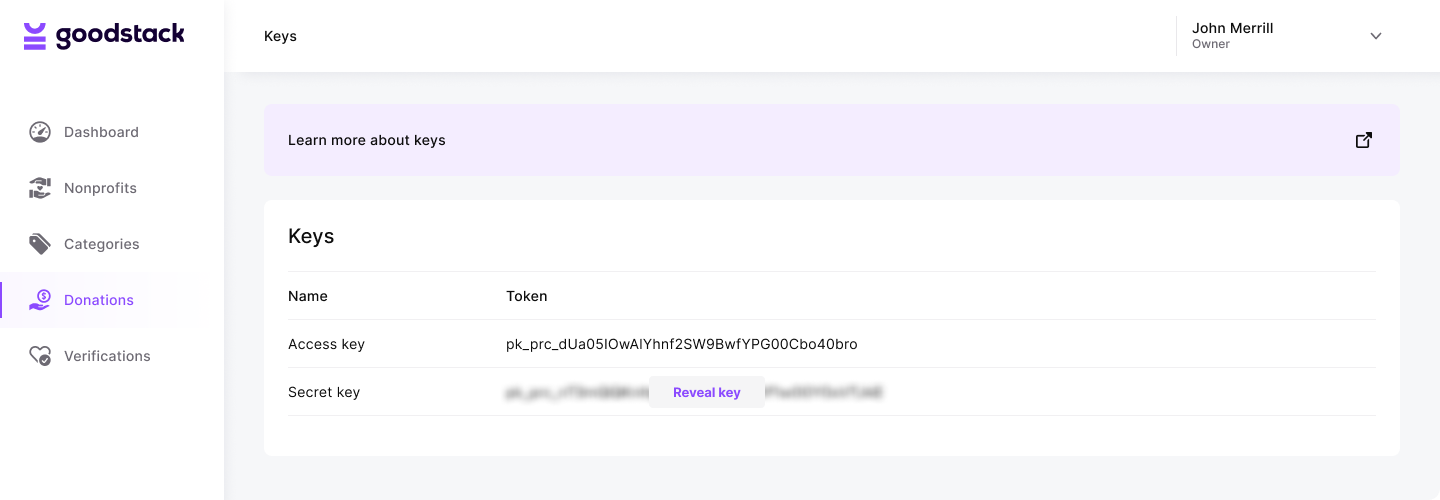
Before you start your implementation, you’ll need access to the dashboard to retrieve your Goodstack API keys.
Go to the Keys page in your Partner dashboard to access your Publishable Key as well as your Secret Key.

Authenticate your API requests by using these API keys in the request header.
The secret key should be used for server to server requests and the publishable key for requests via your front end to any public API services.
Header parameter name: Authorization
Please do not publish your private key in repos or use anywhere in front end.
2: Find nonprofit
For this step, you’ll need the Search Organisations API
Guide your users to find their nonprofit through your frontend application. Call the Search Organisations API from your frontend application using your publishable API key and display the results back to your users.
The nonprofit search API can be filtered by:
- Country using the countryCode parameter
- Nonprofit name using the query parameter
3: Create donations on behalf of your users
For creating Donations, you’ll need the Donations API
Optional: create a User to track multiple donations against one of your users. You can create a user using the Users API and submit the userId when creating a Donation.
After your user has selected a nonprofit, create a donation using the Donations API, supplying the organisationId of the nonprofit as well as the amount and currency, from your backend application using your secret API key.
POST https://api.goodstack.io/v1/donations
Authorization: Secret Key
Content-Type: application/json

{
	"organisationId": "organisation_xxxxxxxxxxxxxxxxxxxxxxxxxxxxx",
	"amount": 1000,
	"currency": "AUD",
	"userId": "user_xxxxxxxxxxxxxxxxxxxxxxxxxxxxx"
}
On successful response of creating a Donation, you can update the user that they have successfully donated.
4. Track donations
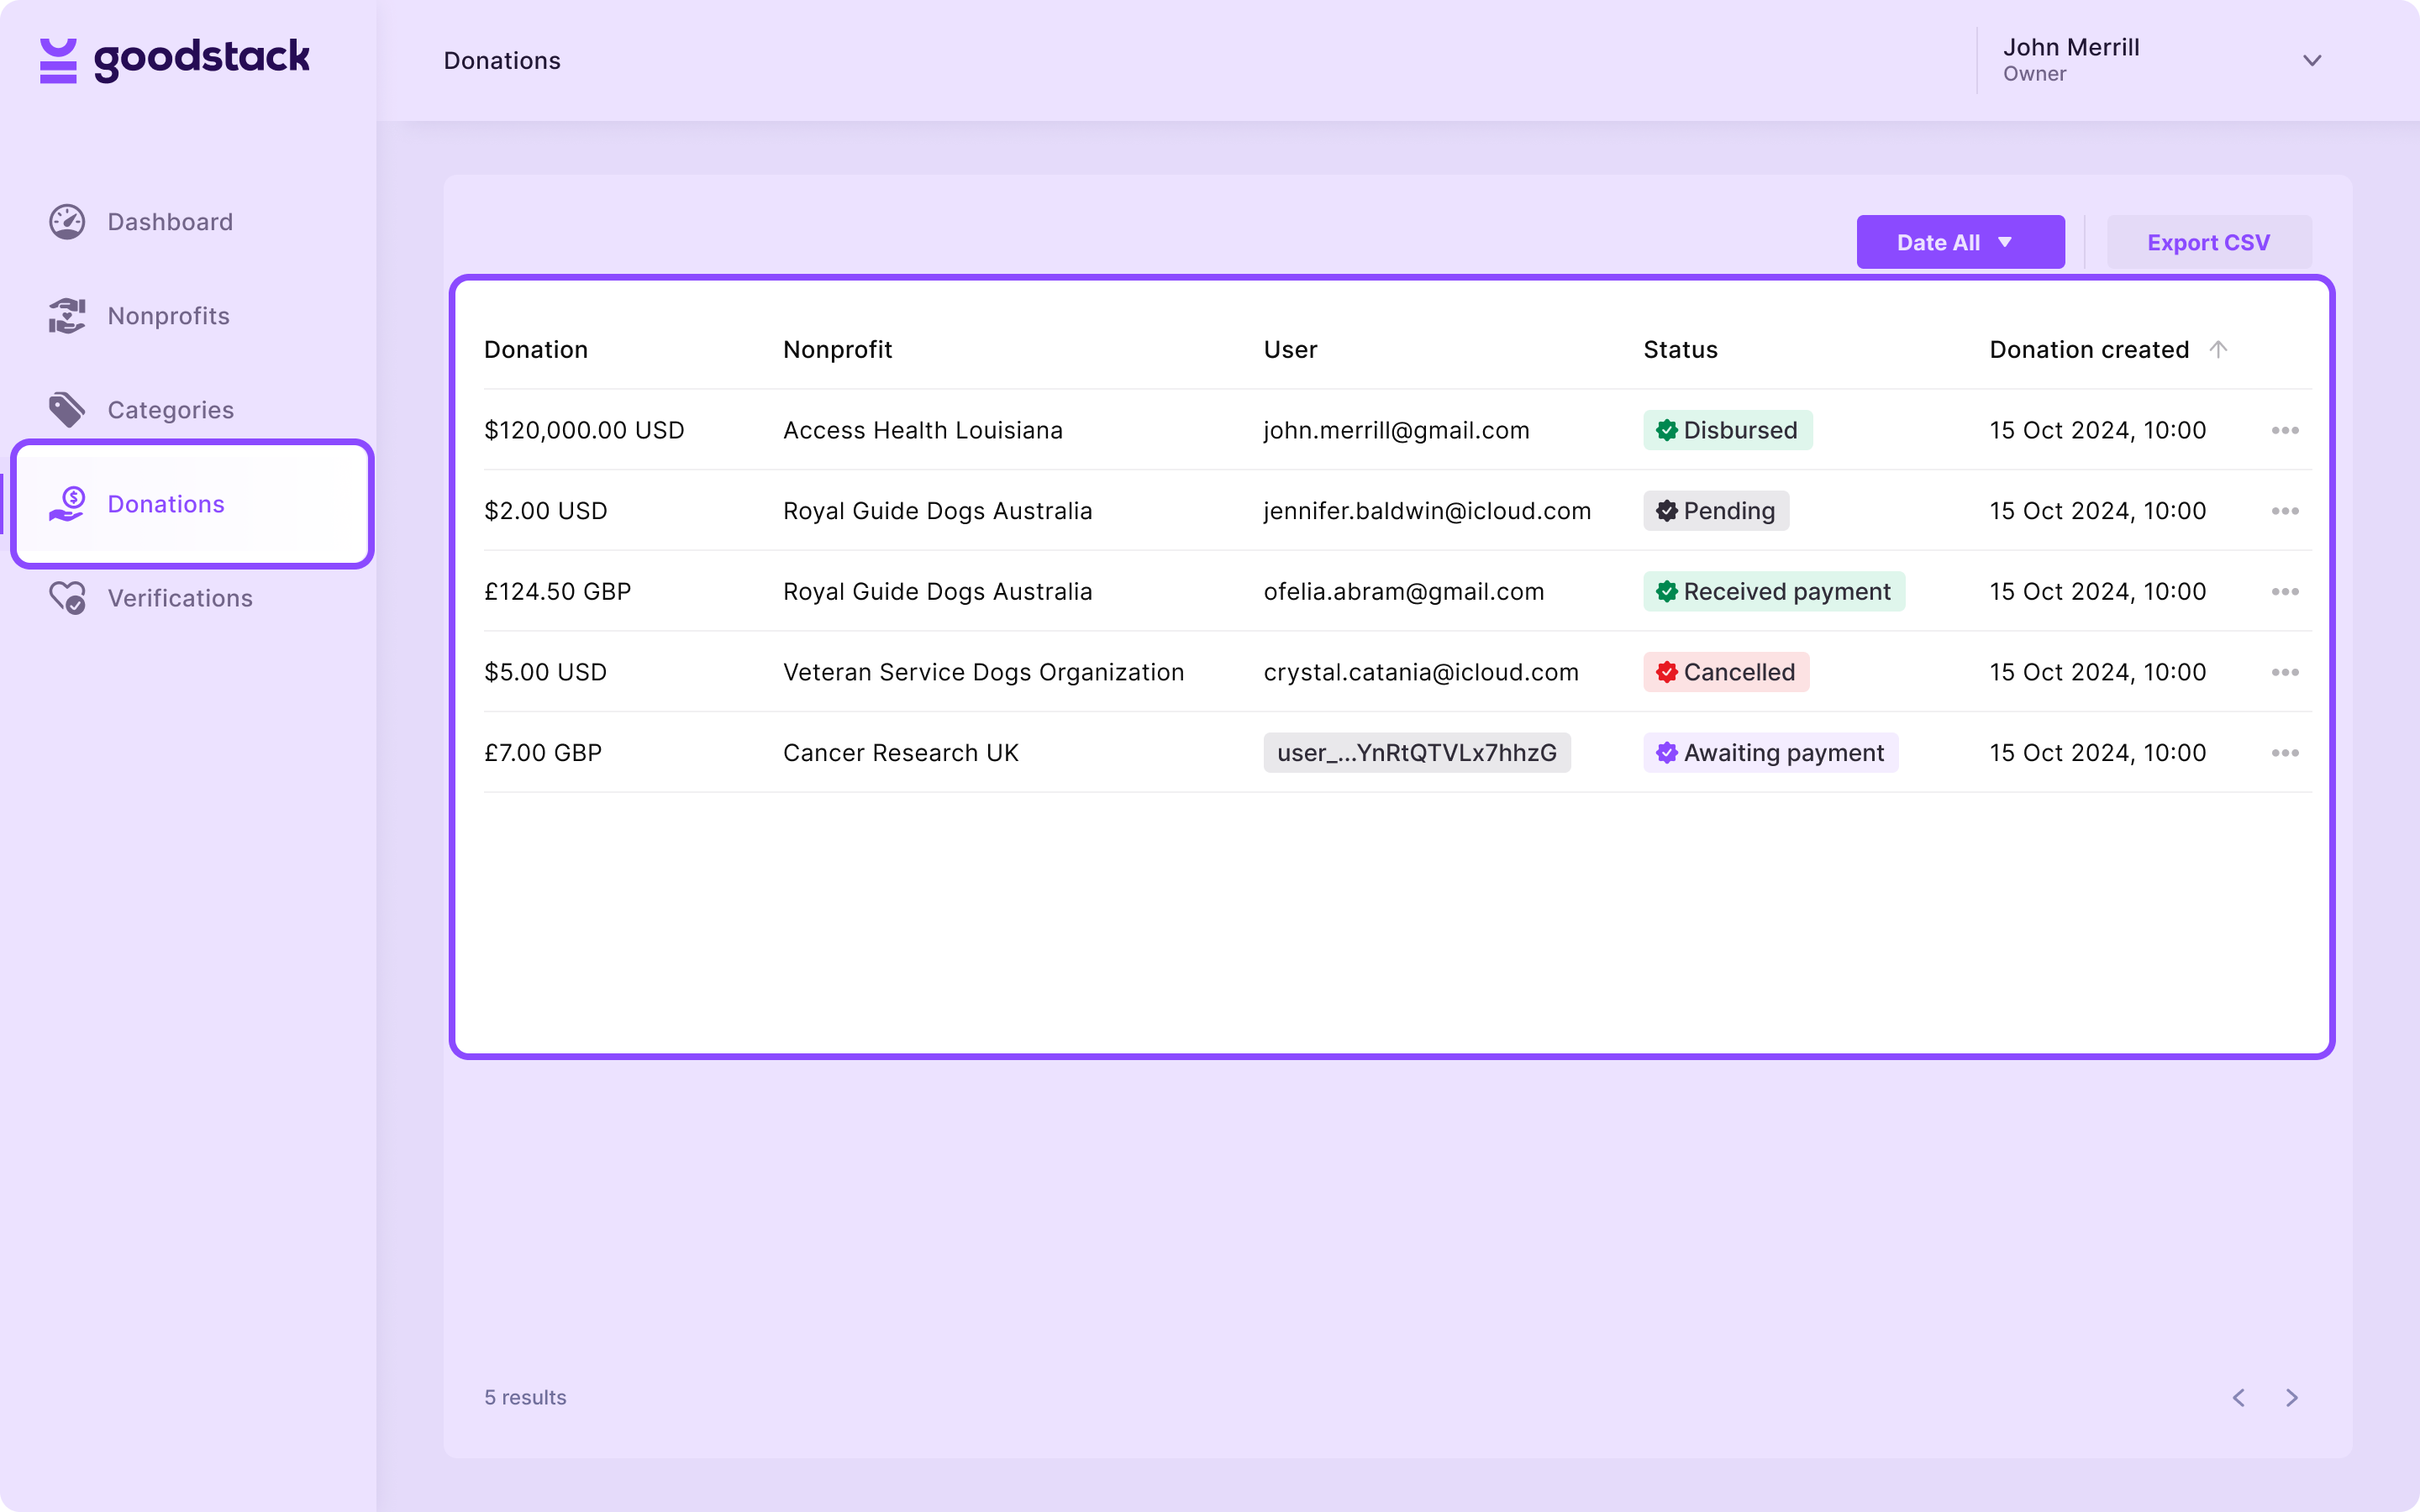
You can view and retrieve donations either in your dashboard (see image below) or using the Donations API.

You can query for Donations by userId and filter by date. A Donation object tracks the lifecycle of a donation.
For a full reference see Donations API.
Donation lifecycle
Donations created through the Donations API will be of type direct and may enter the following statuses:
ACTIVE→ The donation may be edited or cancelled through the Edit a Donation and the Cancel a Donation endpointsREQUESTED_PAYMENT→ Goodstack has requested payment of the donationRECEIVED_PAYMENT→ Goodstack has received payment of the donationDISBURSED→ the donation has been successfully paid out to the nonprofitCANCELLED→ when the donation has been cancelled via the API